Shooting the moon with a Canon EOS R5 Mark II
• 8 min read
I sometimes like to take photos of the moon.
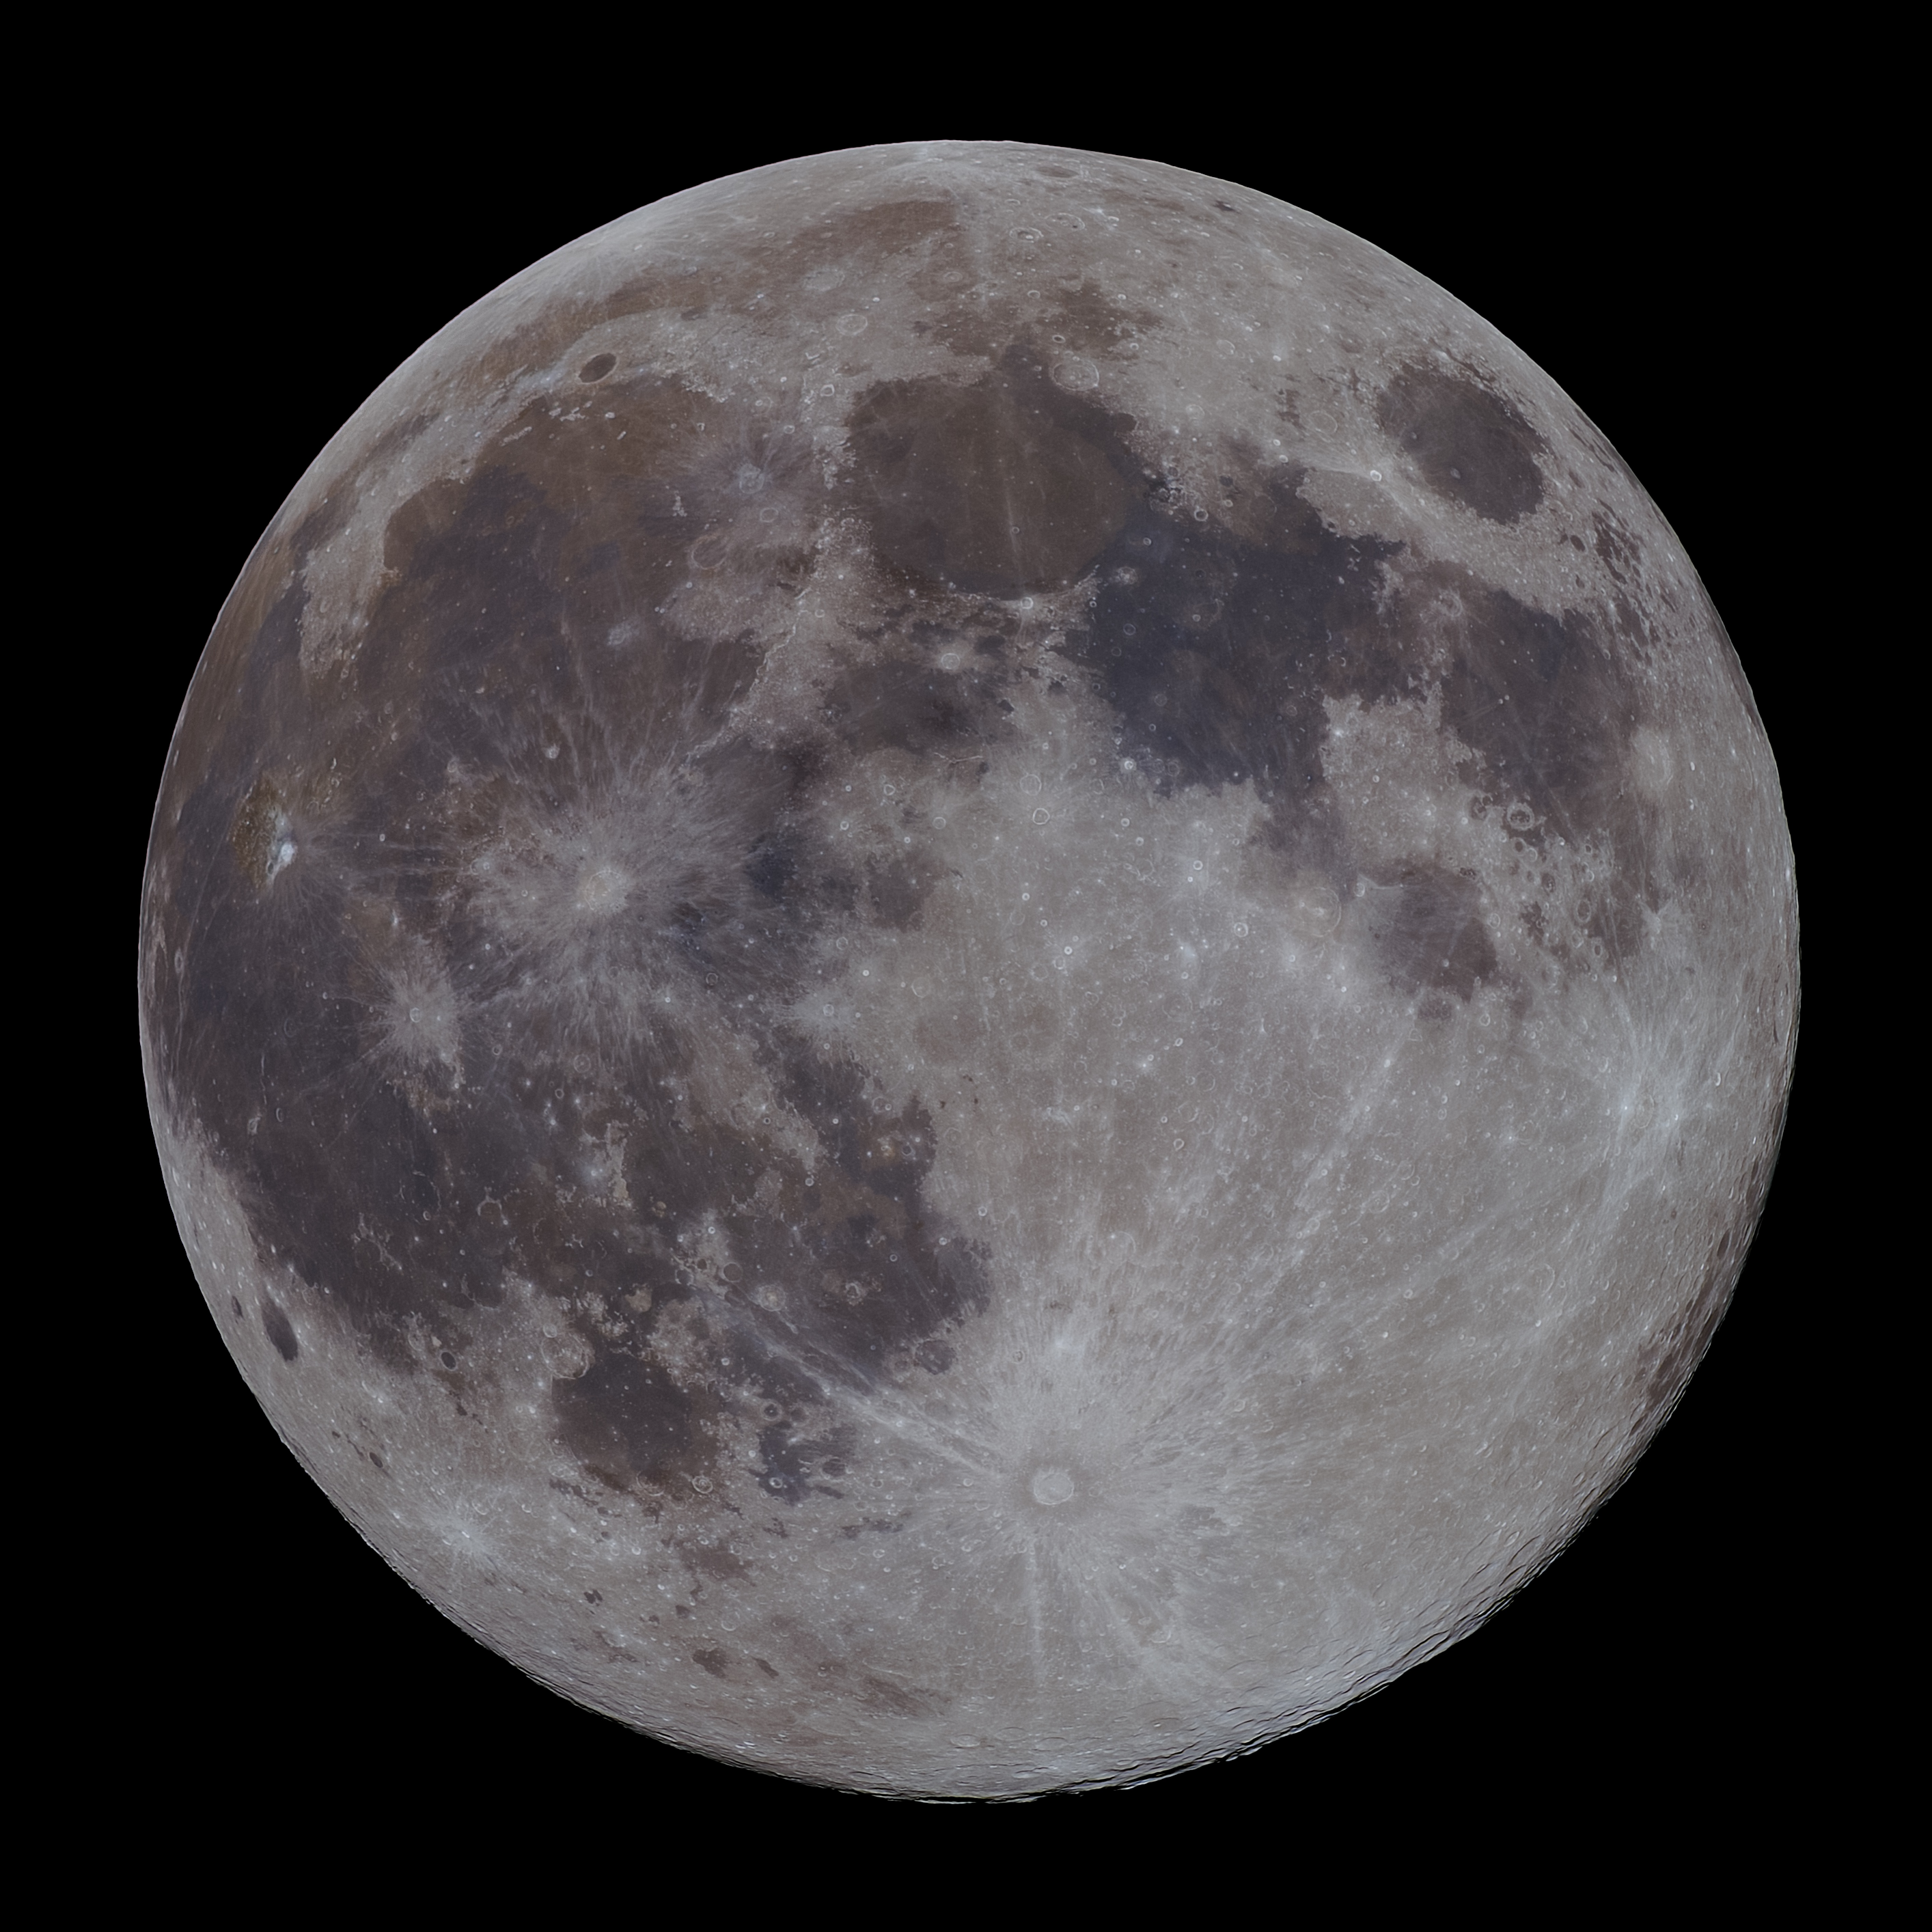
Here’s a recent effort:

That photo of a waning gibbous moon was taken on 8 November 2025, with the moon 83% illuminated.
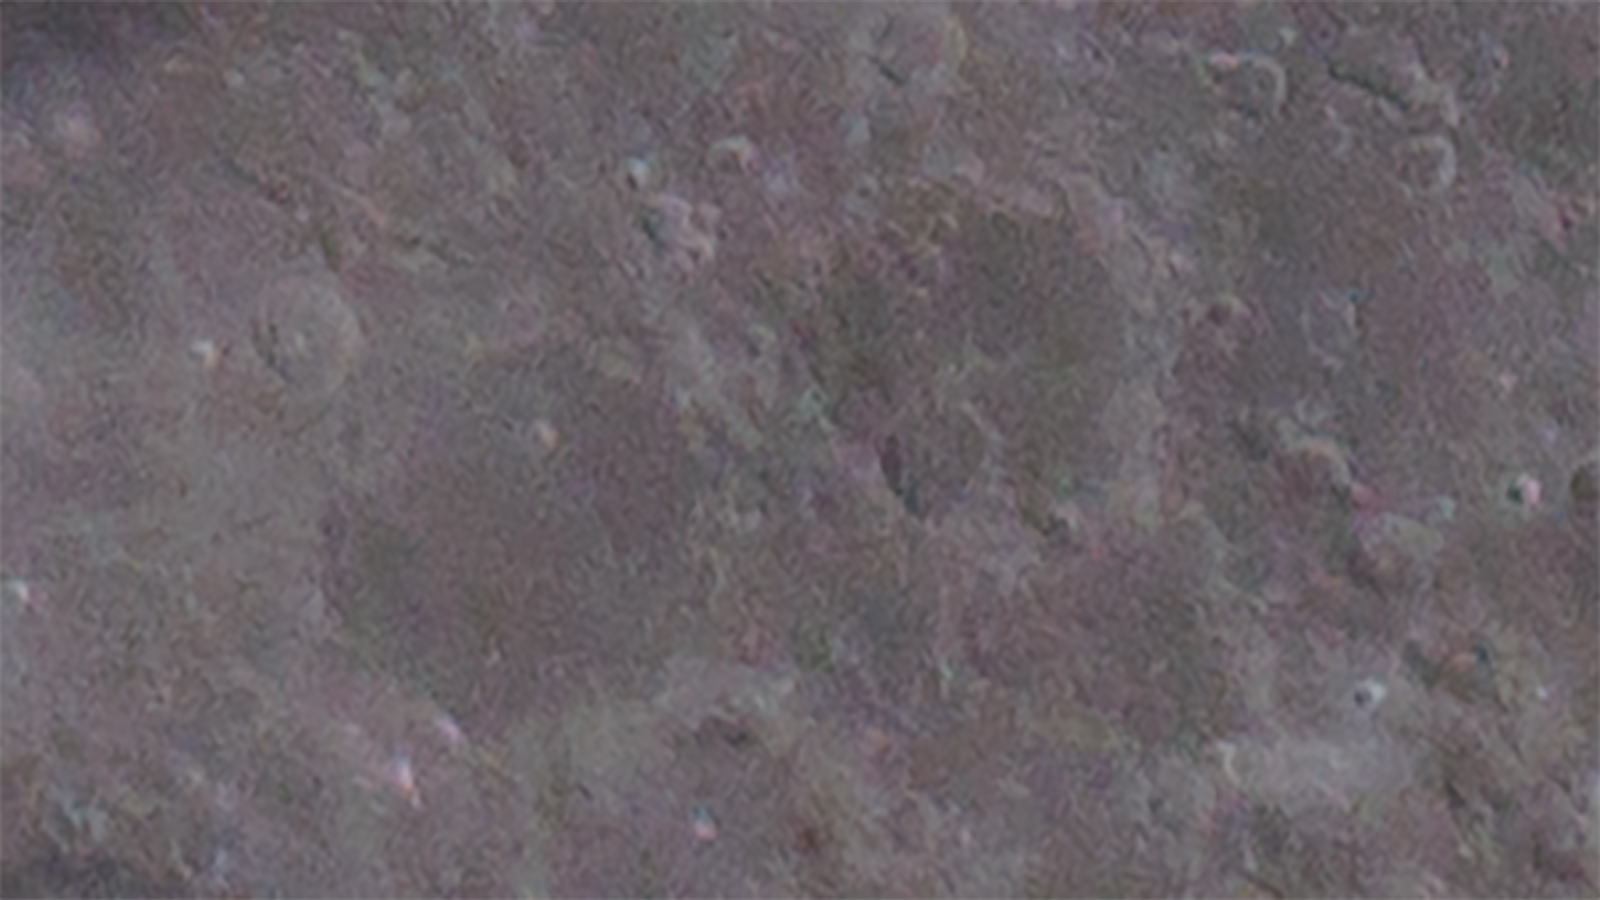
The photo is a stack produced from multiple individual shots taken over a few seconds. Inspired by some other photos online, I tried to draw out a bit of colour. The colour’s still relatively subtle here (and best viewed with night light off on your device). You can see reddish-brown areas, such as the Mare Serenitatis (Sea of Serenity). The nearby Mare Tranquillitatis (Sea of Tranquillity) is darker, with a slight blue tinge, caused by it being rich in ilmenite (as I understand, anyway).
Taking the photo
Equipment
I used the equipment that I had – a Canon EOS R5 Mark II mirrorless camera, an RF 800mm F11 IS STM lens and an RF 1.4x extender, plus a half-decent tripod.
I took 130 continuous shots in RAW format over 4.3 seconds, at ISO 200 and a shutter speed of 1/320s. The extender reduces the aperture to ƒ/16. I stopped at 130 shots because that’s when my camera pauses to take a breather1, and continuous shooting slows down.
I used the electronic shutter to avoid shutter shock and maximise the shooting speed. I took the shots using the Canon Camera Connect mobile app to avoid disturbing the camera (and introducing movement into the photo).
I tried to keep the moon near the centre of the frame where the optical quality of camera lenses is typically at a maximum. Positioning the moon there by adjusting the tripod head is quite difficult (at least with my tripod) as the camera tends to move slightly when locking it into place. (The 1120mm focal length, heavy kit and angle the lens is pointing at are not helping here.) A trick I use is to move the rear tripod leg to make small adjustments to framing – this ends up being far easier and accurate.
I repeated the process a few times so that I have a few different sets of shots to choose from.
At 1120mm, every tiny vibration is magnified. Hence, keeping the camera stable is important. That includes placing the tripod on a stable, solid surface – you don’t want footsteps to introduce vibrations, for example.
I used to make micro-adjustments to the camera focus using the Canon Camera Connect mobile app and the 15x live view zoom. Something must’ve been different when I last successfully did that, though, as the lag when making the adjustments combined with how quickly the moon was moving on screen simply made it impractical.
Timing
I kept an eye on the weather forecast to see when the night sky would be free of clouds, while also keeping tabs on the moon phase, distance from the Earth and position in the sky.
The distance of the moon from the Earth can vary from roughly 357,000 km to 406,000 km. It might be wishful thinking, but I like to wait until the moon is close-ish in the hope that I’ll get a better shot. (At the very least, it’ll fill more of my camera’s sensor.) For this shot, the moon was approximately 365,239 km away.
I wait until the moon is relatively high in the sky before taking my photos. When it’s low in the sky, you’re viewing it through much more atmosphere and so there will be more atmospheric turbulence, distorting details.
I usually don’t bother taking photos of a full moon. Photos when less of the moon is illuminated will reveal much more detail and so tend to be much more interesting.
Processing the photos
Once I got my shots, I headed back inside and loaded them into Adobe Lightroom. I had a quick look at the different sets of shots and picked out the sets that don’t have any obvious problems.
I then tweaked the Lightroom develop settings for one of the good sets of photos. I adjusted exposure to +1.35 as my shots were a bit underexposed. I disabled sharpening, chromatic aberration correction and noise reduction to avoid interfering with the stacking process. I changed the profile from Adobe Color to Camera Standard, as it looked more accurate compared to other moon photos online such as those from NASA. (The difference it made was similar to adjusting the contrast and shadow sliders with the Adobe Color profile.) I bumped up the saturation at this stage as well to try and draw out some colour.
I then exported all the photos as 16-bit PNGs (although I realised afterwards that exporting uncompressed TIFFs is much much faster).
Stacking
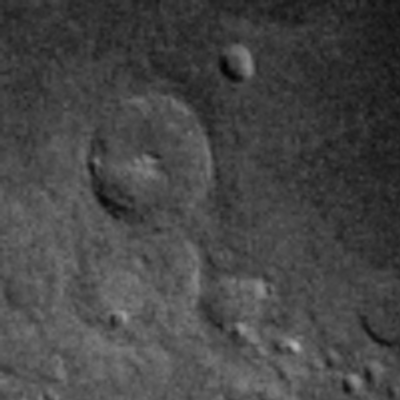
Here is a video made up of 200x200px crops of one of the set of photos taken, scaled to 400x400px:
The craters wobble and change shape slightly between shots. Stacking the photos evens out those differences and reduces noise considerably.
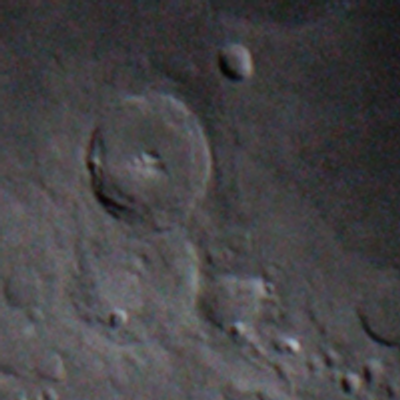
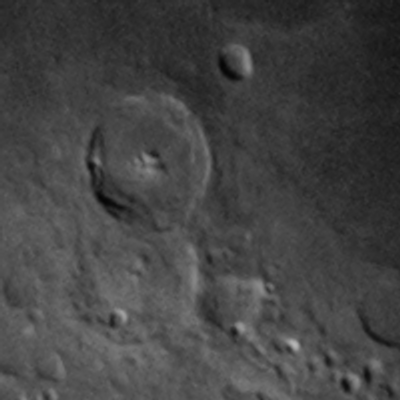
(The main crater in that video is Theophilus. Incidentally, I came across a great shot of it on Wikipedia. There are many other great images from the same uploader on the Gruppo Astrofili William Herschel website.)
#/media/File:Theophilus_Si_Barbero_Zetta_Ferruggia.jpg)
I used AutoStakkert! to do the stacking. It’s fairly straightforward to use. After loading in my photos (which can be easily done by dragging and dropping them on to the app), I checked the settings and clicked the Analyse button. Once the analysis is finished, it shows a quality graph, from which you can read what percentage of photos are above different estimated quality levels.
Ctrl-clicking on the graph will set the percentage of images to stack at the corresponding point on the x-axis. In this case, I included 41% of the individual photos in the stack. Including too many may result in a stacked image that is too soft.
I then selected the command to make AutoStakkert! automatically place alignment points, and finally I started the stacking step. A little while later, I have a new, stacked PNG.
A problem of RGB alignment
Going back a step, I noticed that, when disabling colour noise reduction in Lightroom, the red, green and blue channels of the photos became misaligned.
Here is a 200x200px crop of an individual photo, scaled to 200%, along with greyscale versions of the red, green and blue channels from that crop:
All channels
Red
Green
Blue

The green channel is shifted slightly left and up from the red channel, and the blue channel is shifted a bit further in the same way. I’d never have guessed that colour noise reduction would correct this. Nonetheless, I wanted to keep noise reduction off to allow the stacking process to do its job.
(If you’re wondering why the green channel is so much clearer, it’ll probably be because my camera uses a Bayer filter, which uses a filter pattern with twice as many green filters as red or blue ones.)
AutoStakkert! has an RGB alignment option to align the stacked image. However, I got better results using OpenCV via a Python script. That script calculates and applies an affine transformation to the red and blue channels to get them to better fit the green channel. It did a good job of sorting things out and got rid of almost all colour fringing that the misalignment was causing.
Additionally, I did a whole-pixel shift RGB alignment of the input images. I did this as there were occasions where it reduced noise in a few odd spots in the stacked image. (However, for the most part, that extra step made little difference – there may be some other explanation for the effect I saw.)
Sharpening
The stacked image is a little bit soft. It’s not greatly noticeable in this case unless you zoom in. Still, getting the image sharper is worthwhile.
To sharpen planetary images while minimising artefacts, wavelet decomposition is typically used to selectively enhance finer details like craters.
I used waveSharp for this photo. It does a good job, but is also very slow. Another option is the À trous wavelets transform tool in Siril, which is much faster if you can’t get on with waveSharp.
It’s easy to go too far when sharpening the image. I tried to strike a balance and avoid that here.
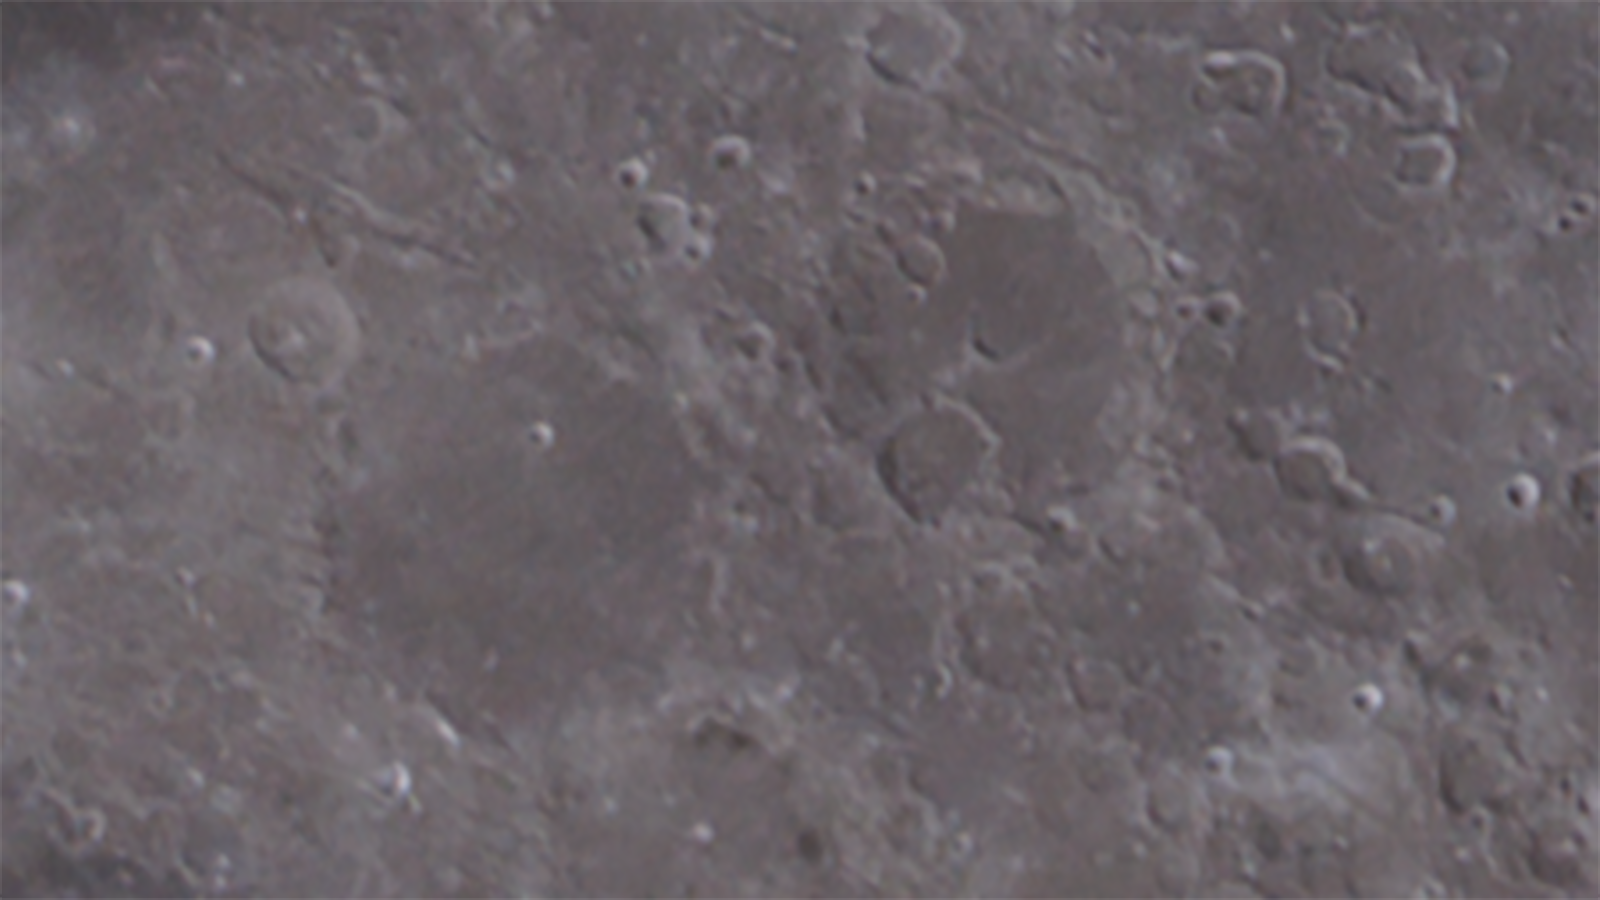
Visualising the steps so far
Here are some 400px by 225px crops, scaled to 400%, to visualise the main steps so far.
The crops show:
- A single frame exported from Lightroom, with the default sharpening and noise reduction enabled. (This is to get an idea of what you would have without stacking.)
- A single frame exported from Lightroom, with the default sharpening and noise reduction turned off.
- The stacked image.
- The sharpened version of the stacked image.
All have saturation turned up, which makes chroma (colour) noise much more noticeable.
Single frame (processed)
Single frame (unprocessed)
Stacked

Sharpened
Finishing touches
Lastly, I loaded the sharpened photo into Photoshop and used the Camera Raw filter to make a few small finishing tweaks (such as tweaking the colour temperature).
Revisiting another photo
I also revisited a similarly stacked photo of a waxing gibbous moon I took on 8 April 2025, and brought out a touch of colour in that one too:

What about the full moon?
Okay, I did take photos of the supermoon on 4 December 2025. Here’s the stacked version:
This one was processed a bit differently – I stacked two consecutive sets of photos I took to further reduce noise in the stacked version, and the sharpening has been pushed further.
As I hinted at earlier, the even lighting during a full moon makes craters and other surface details look flat. It does mean that the colours come out more consistently, though.
Wrapping up
I quite like drawing out a touch of colour in my moon photos. It adds another dimension of detail, which is especially nice in parts of the photo that are otherwise undefined.
I don’t claim to have a clue what I’m doing, and I always wonder if I can get better shots with the same kit. Perhaps a slightly faster shutter speed will do a better job at freezing atmospheric turbulence. And I wonder if I would be better off ditching the extender, as that will allow me to shoot at an aperture of ƒ/11 and get more light in, potentially allowing me to shoot at a lower ISO and reduce noise.
Mind you, Jupiter’s getting close – it may well be time to retry taking a photo of it.
Footnotes
-
According to the official specs, the camera should pause after 93 continuous RAW shots taken at 30 fps. I seem to be doing better than that here. ↩